Final product.
 In order for the show to work properly, the laser needed to be well aligned with the galvos - and it was beneficial to have the rest of the components mounted as well. This screenshot shows my design for a protective casing for the whole project, in
 Testing the fit of the walls. I wanted the Arduino and power supply to be easily accessible without disassembling the project.
 Base assembled with Arduino, galvo block and X and Y galvo drivers.
 Laser projector in action. In order to project images, I created DXFs, converted them to G-code, and then converted those paths to hexadecimal, which the Arduino reads and uses to direct the galvos.
 Close up of wall with USB mount and power cable ports.
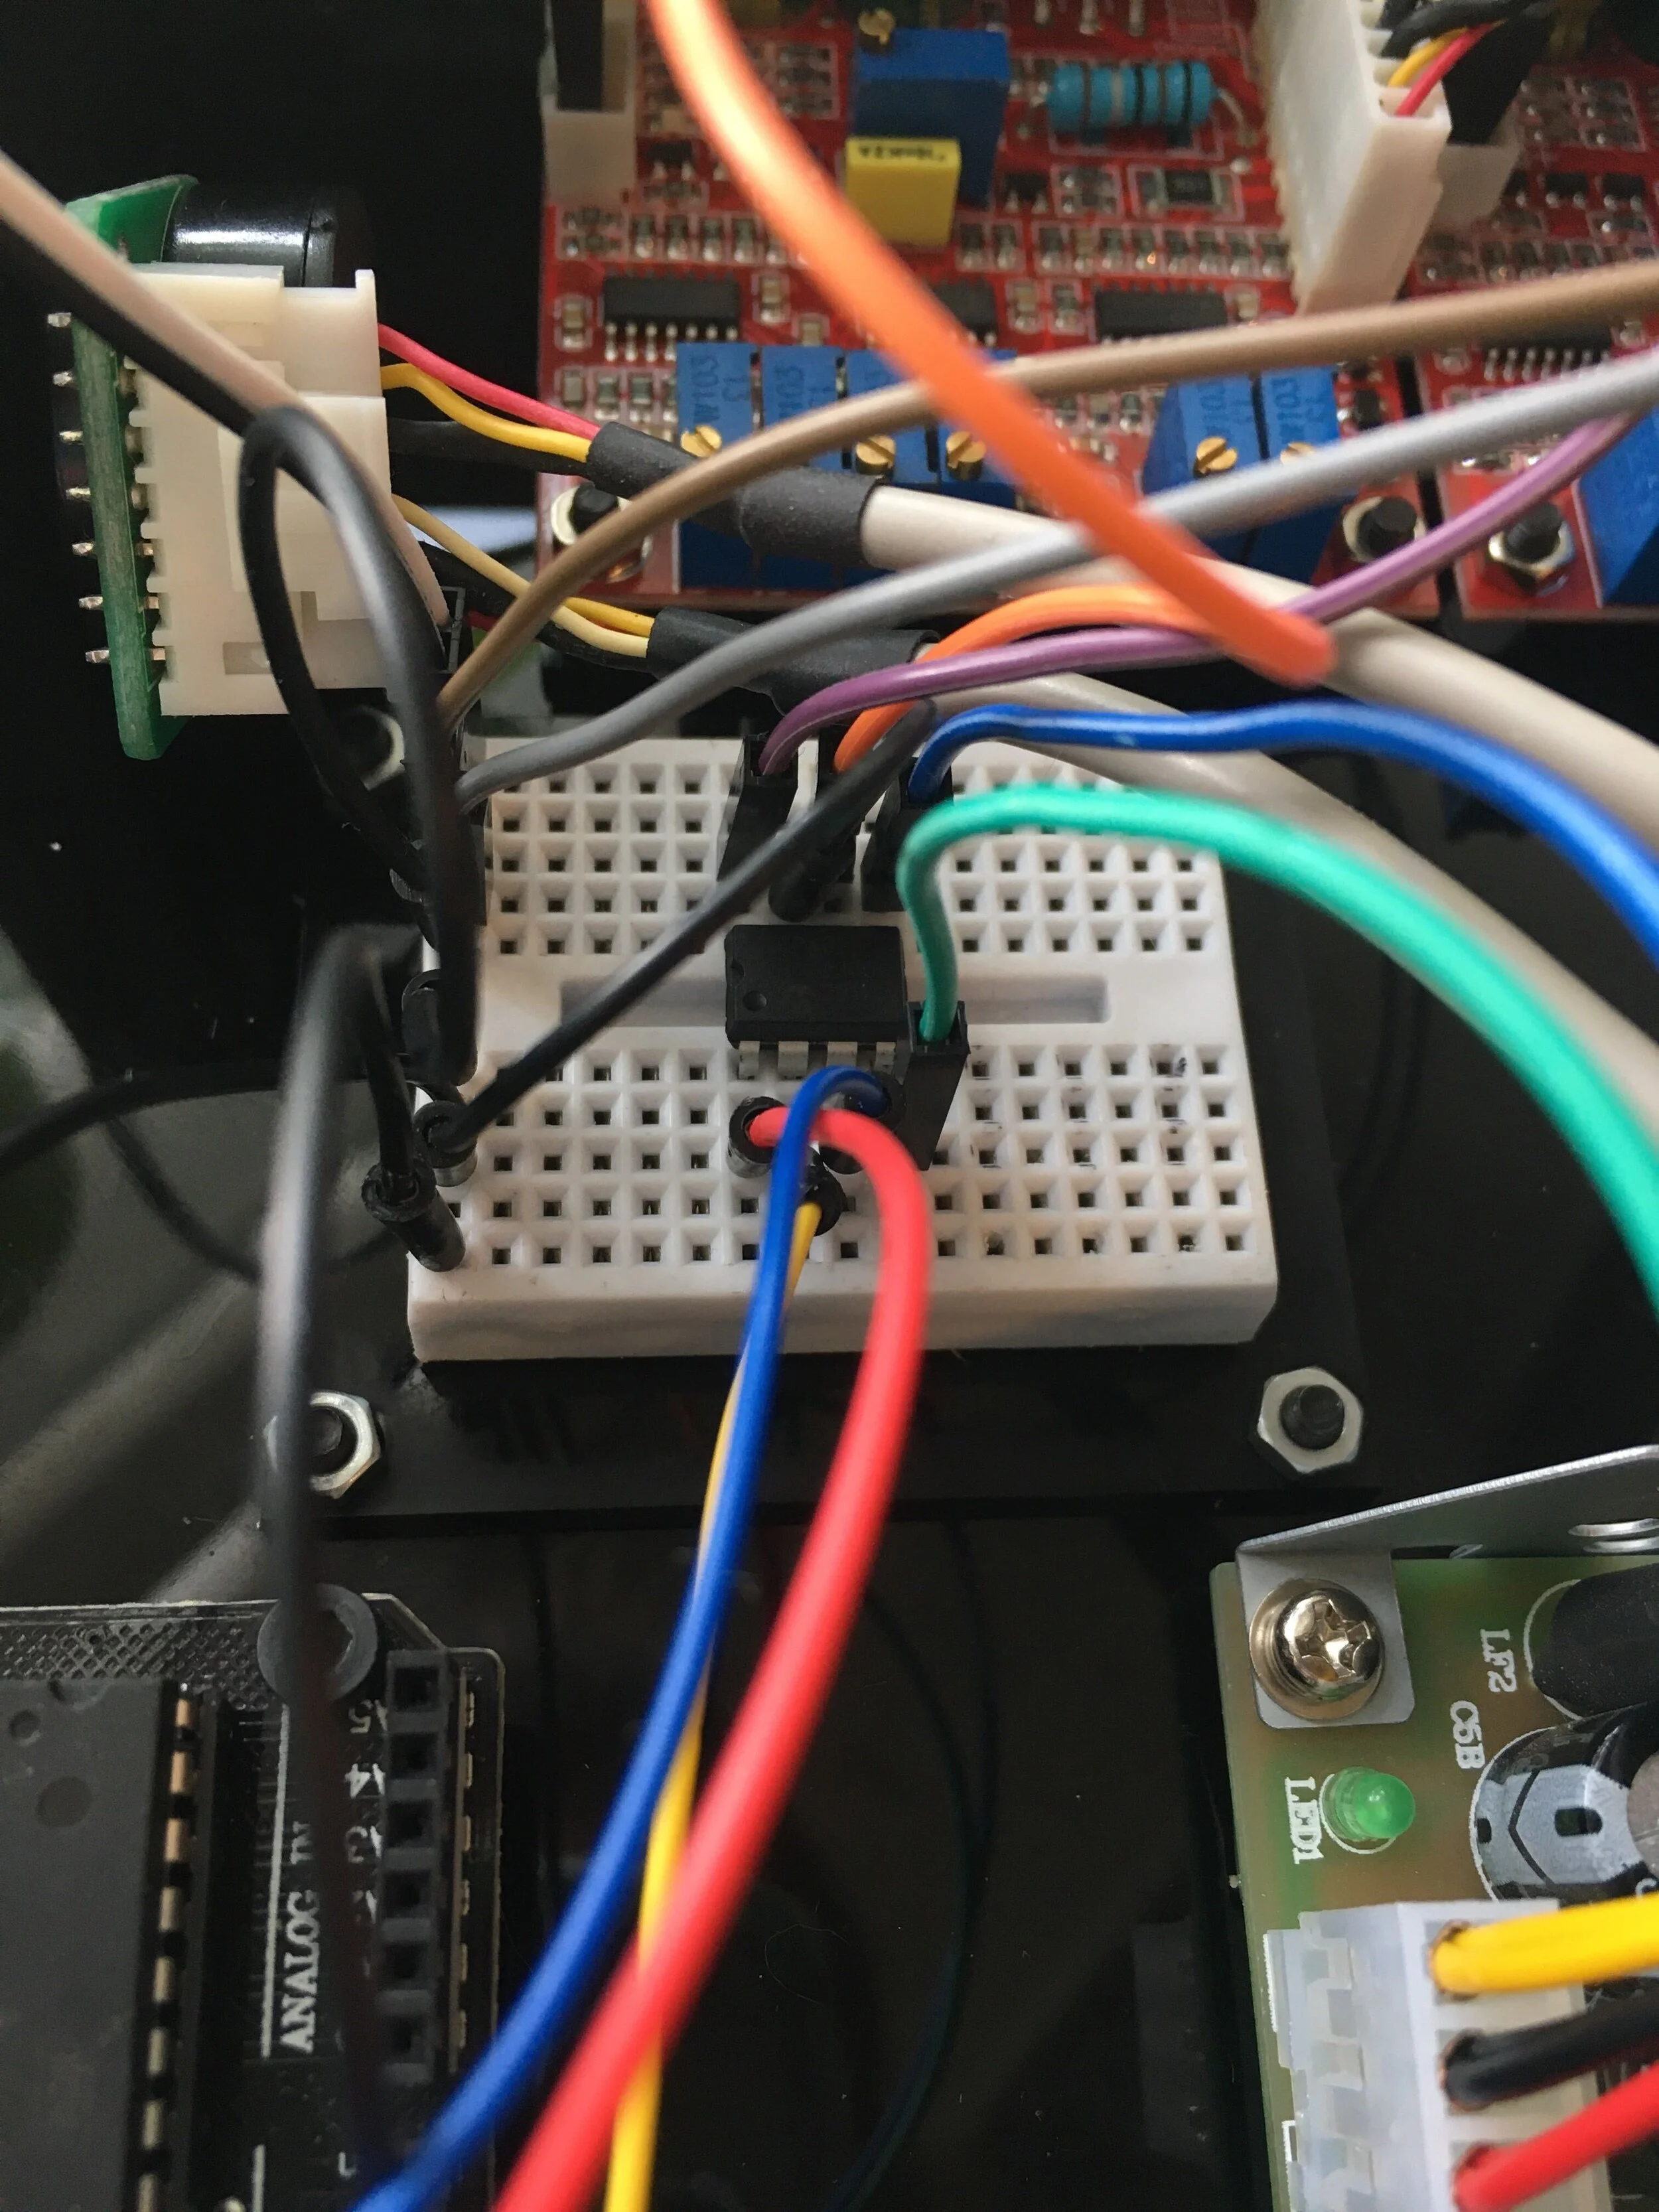
 Close up shot of the breadboard - featuring the MCP4822 digital to analog converter microchip which output signals to the galvo drivers from the Arduino.
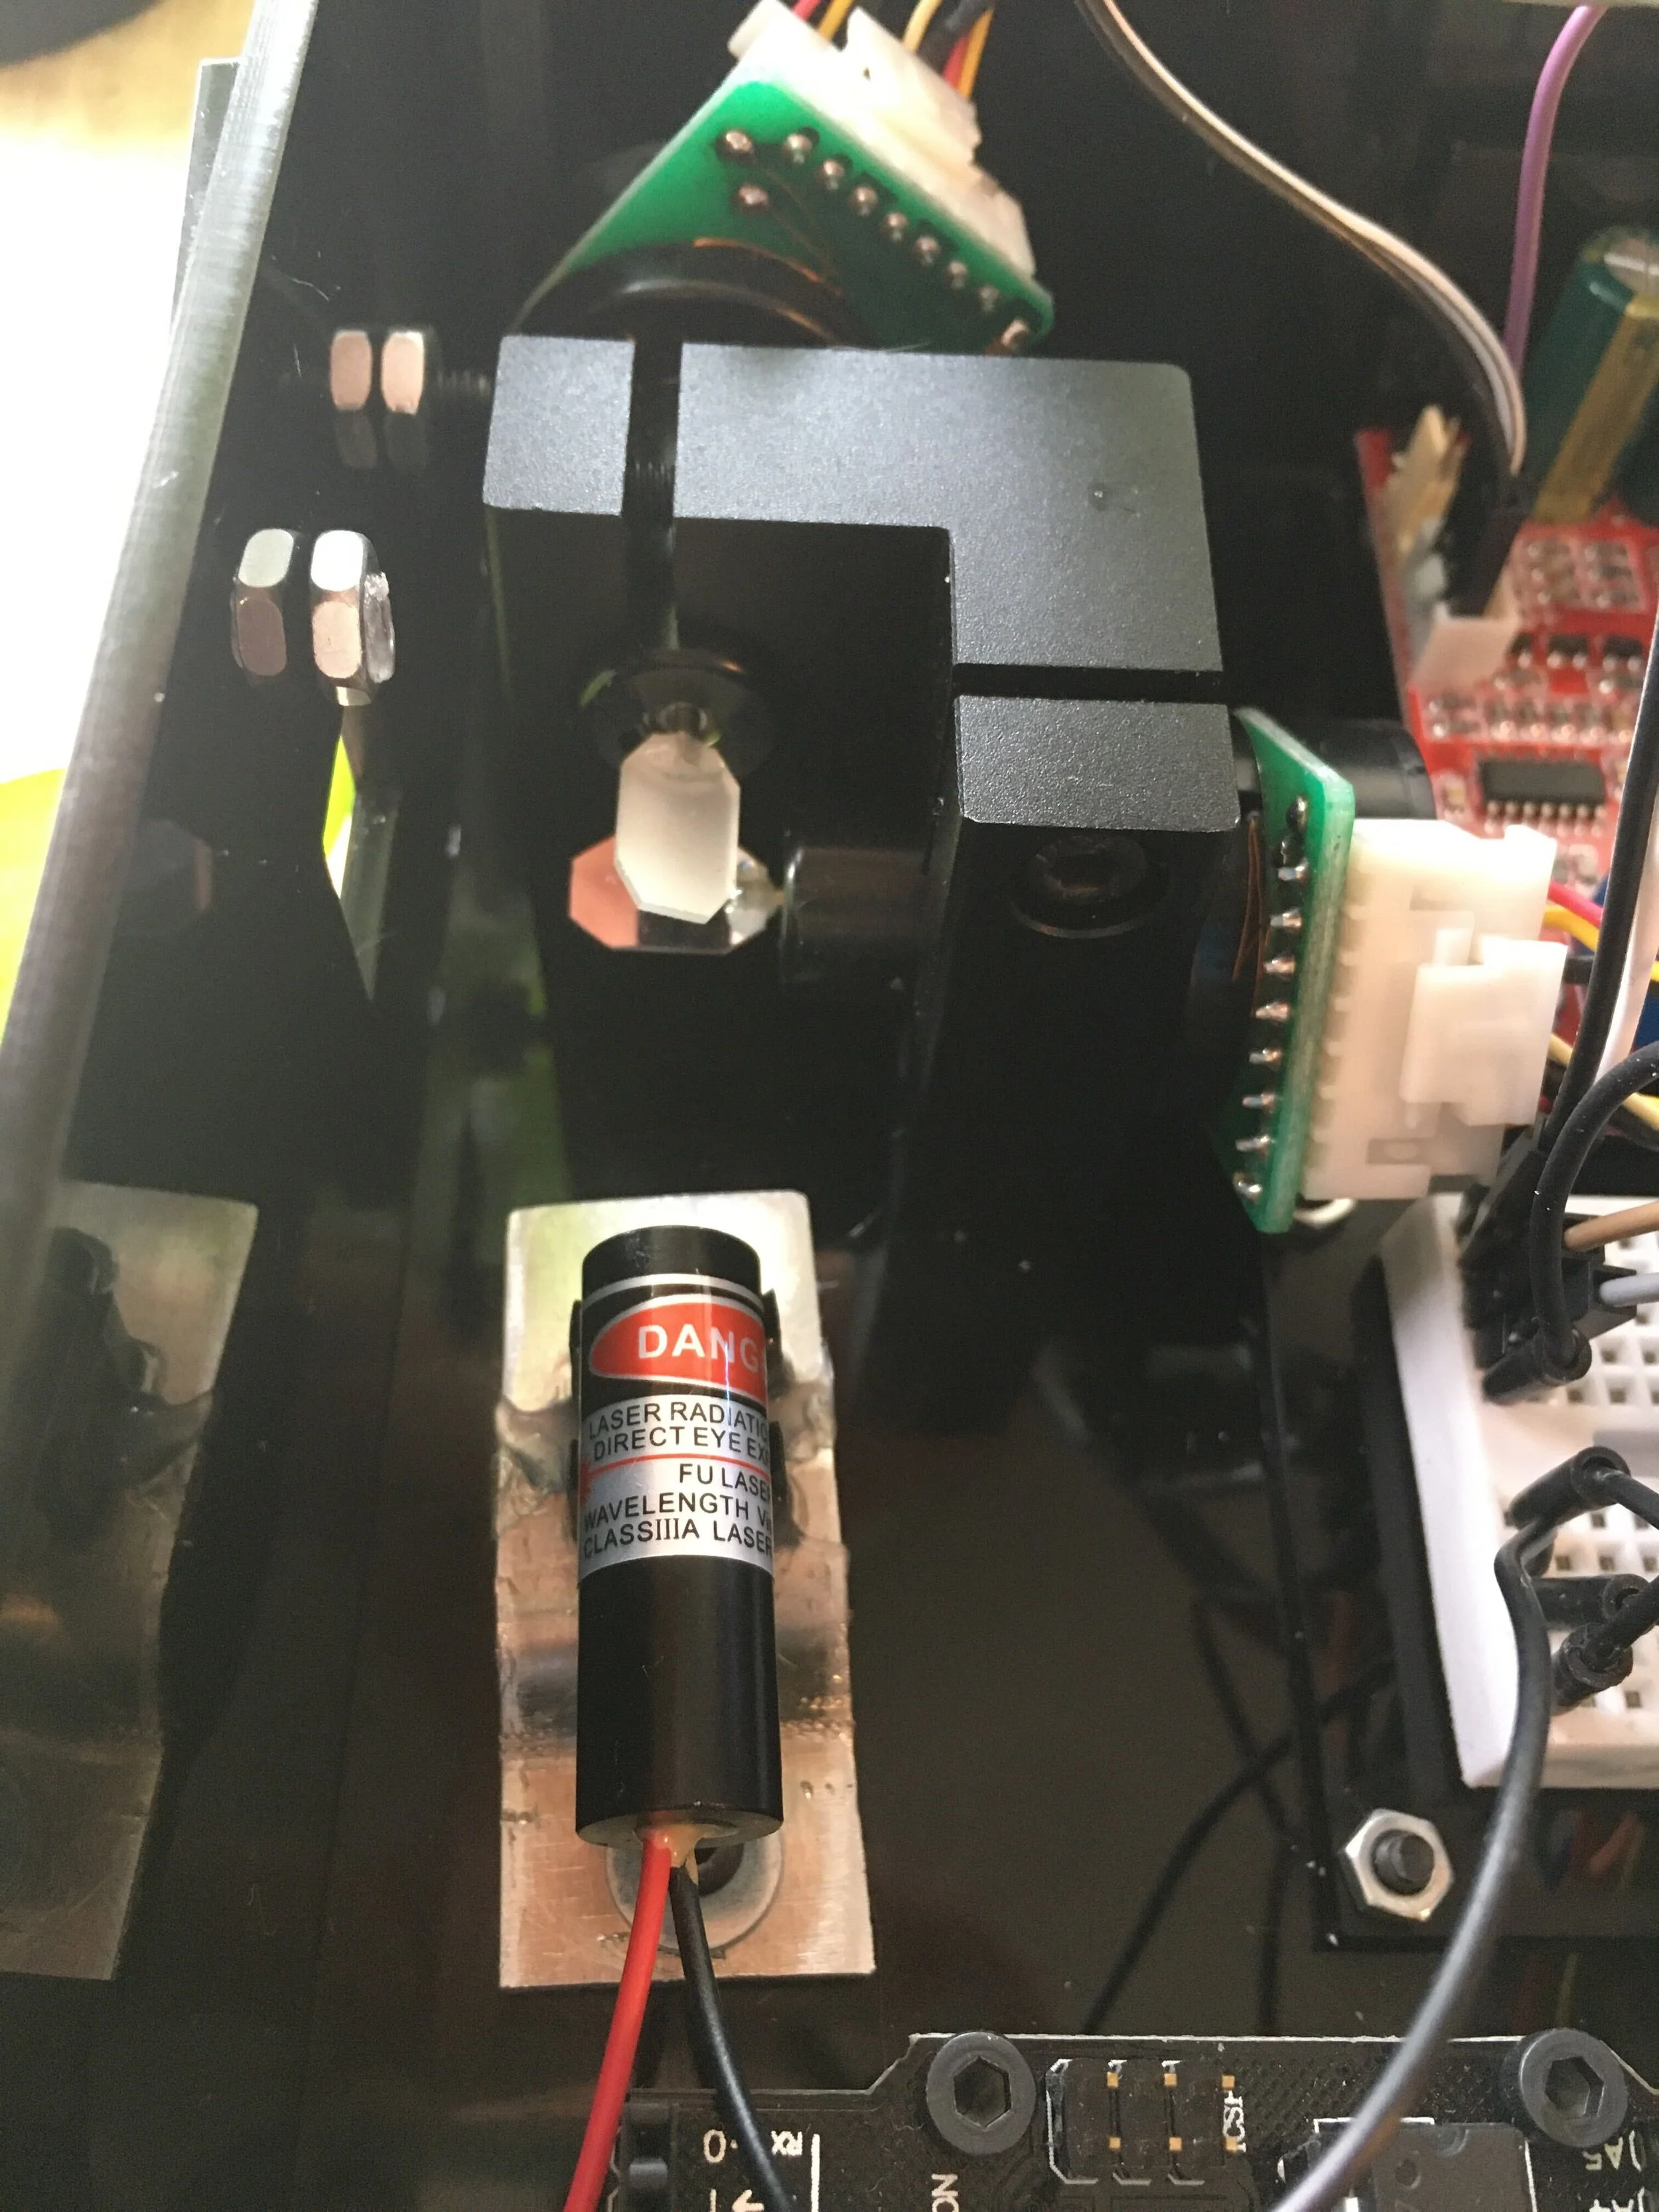
 Close up of laser adjustment. In order to for the laser projector to work without skewing, there needs to be good alignment between the laser and each of the galvo mirrors. In order to achieve this, I created a laser mount with horizontal and vertic
 Bodee enjoying the laser show.
 Close up of laser window to avoid contamination (or firing the laser at an unsuspecting bystander).
prev / next